Charming Heart-Shaped Sugar Cookies
Highlighted under: Classic Baking Recipes
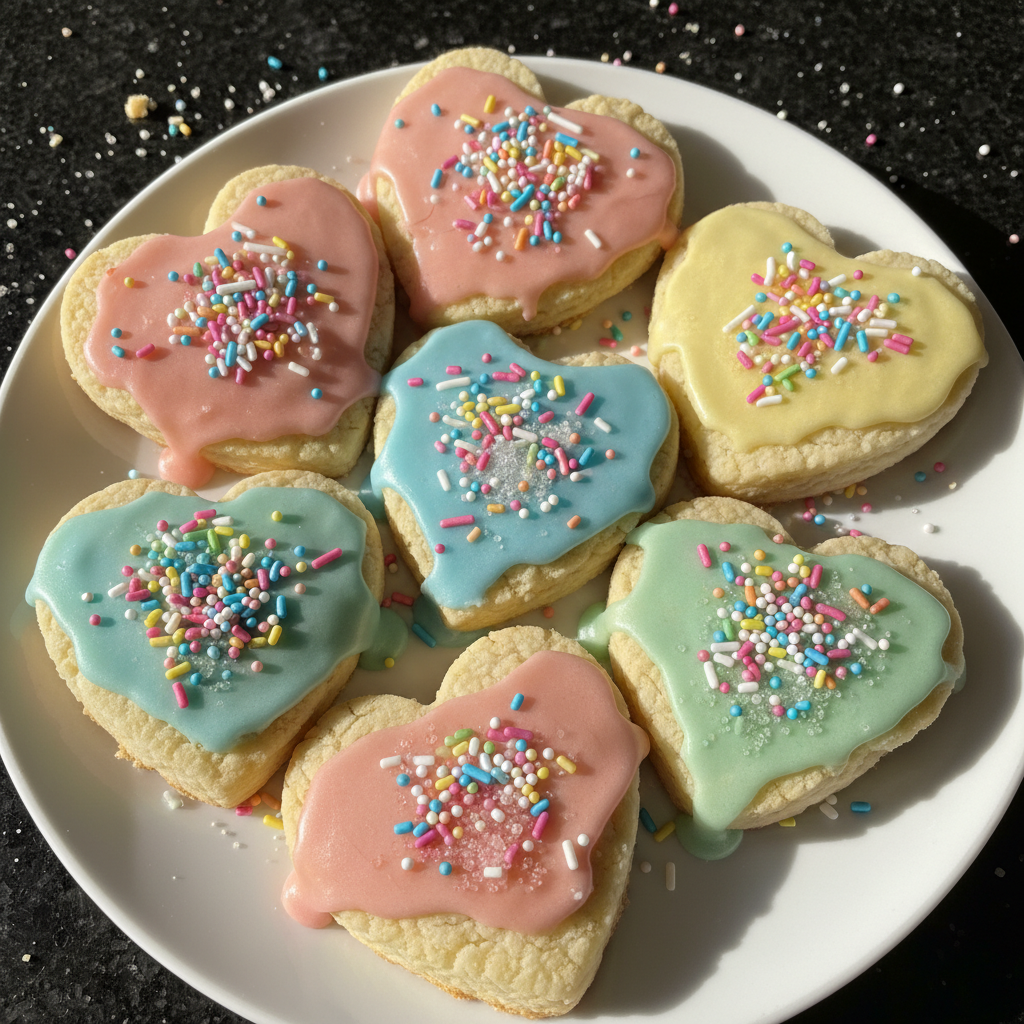
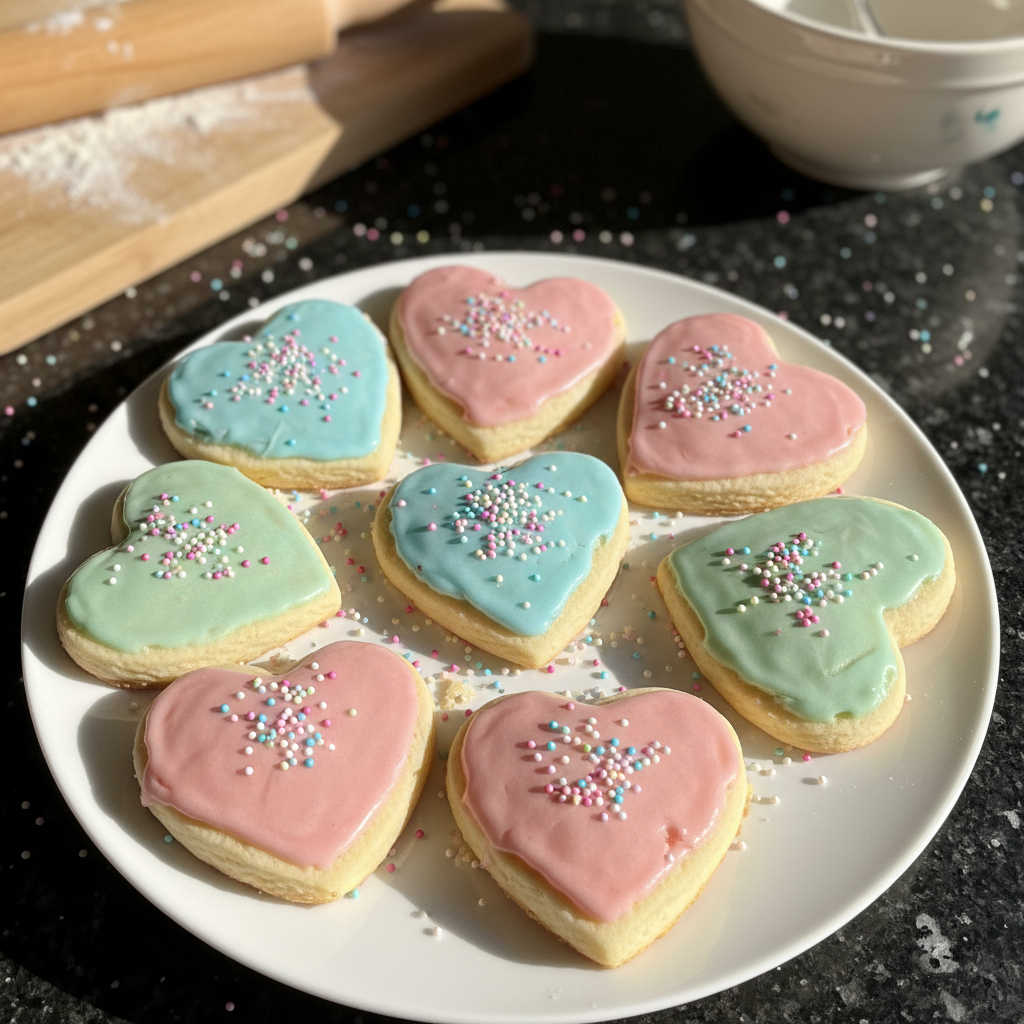
I absolutely adore baking these charming heart-shaped sugar cookies—perfect for any occasion! The sweet, buttery flavor combined with a hint of vanilla creates a delightful treat that everyone loves. With their soft texture and crisp edges, these cookies are not just a feast for the taste buds but also make for beautiful decorations. I've had so much fun experimenting with different icing colors and sprinkles, making each batch uniquely special. It’s a wonderful way to share love and joy with friends and family.
Every time I bake these heart-shaped sugar cookies, I’m transported back to my childhood. Decorated with vibrant icing and colorful sprinkles, they never fail to elicit smiles. I learned that chilling the dough is crucial; it makes rolling and cutting much easier while ensuring the cookies hold their shape during baking. I usually make double the batch because they disappear so quickly!
One of my favorite tips is to use almond extract alongside vanilla for an enhanced flavor profile. It adds a nice twist that elevates the traditional sugar cookie taste. Believe me, once you try this combination, you won’t want to go back!
Why You'll Love This Recipe
- Delightful sweetness that both kids and adults adore
- Versatile for all occasions—add your favorite colors and toppings
- Soft, buttery texture that melts in your mouth
Perfecting Your Dough
The key to achieving the perfect texture in your sugar cookies lies in the creaming process. When you cream the butter and sugar together, aim for a light, fluffy consistency. This incorporation of air during the mixing will help the cookies rise and create a soft, tender bite. Make sure your butter is softened, as this aids in emulsification and further promotes a smooth and creamy mixture.
When it comes to adding your dry ingredients, mix them in gradually. This prevents overworking the dough, which can lead to tougher cookies. Combine until the flour is just incorporated—it's fine if there are a few flecks of flour left. This technique is crucial for maintaining that soft, buttery texture everyone loves!
For an extra tip, I recommend using a flour sifter when combining the dry ingredients. This will ensure there are no lumps and will help aerate the flour, resulting in lighter cookies. Remember to check the consistency of the dough; it should hold together but not be sticky.
Icing Insights
When preparing the icing, the ratio of powdered sugar to milk is critical. You want a consistency that is thick enough to hold its shape, yet smooth enough to spread easily. If your icing is too thick, gradually add more milk, a teaspoon at a time, until you reach the desired consistency. If it’s too runny, mix in more powdered sugar until it thickens.
Food coloring can be a fun way to customize your cookies for various themes or occasions. However, I suggest using gel food coloring instead of liquid; gel colors are more concentrated, which means you’ll need less to achieve vibrant colors without altering the icing consistency. Mix in the coloring well until it’s evenly distributed for the most attractive results.
For a beautiful finish, consider using piping bags with different tips for decorating. This technique allows for greater control and precision when adding intricate designs or messages onto your cookies. If you don't have piping bags, a sturdy zip-top bag with a small corner cut off can work just as well.
Ingredients
Gather these ingredients to create your charming cookies:
For the Cookies
- 2 3/4 cups all-purpose flour
- 1 teaspoon baking powder
- 1/2 teaspoon salt
- 1 cup unsalted butter, softened
- 1 1/2 cups granulated sugar
- 1 egg
- 1 teaspoon vanilla extract
- 1/2 teaspoon almond extract
For the Icing
- 2 cups powdered sugar
- 2 tablespoons milk
- 1 teaspoon vanilla extract
- Food coloring (optional)
- Sprinkles (optional)
Make sure to prepare your ingredients ahead for an easier baking experience!
Instructions
Follow these simple steps to bake the cookies:
Prep the Dough
In a bowl, whisk together flour, baking powder, and salt. In another bowl, cream together butter and sugar until fluffy. Beat in egg, vanilla extract, and almond extract. Gradually add dry ingredients, mixing until just combined.
Chill and Cut
Wrap the dough in plastic wrap and refrigerate for at least 1 hour. Once chilled, roll out on a floured surface and use heart-shaped cookie cutters to cut the dough into shapes.
Bake
Preheat the oven to 350°F (175°C). Place the cookies on a baking sheet and bake for 8-10 minutes, or until edges are lightly golden. Allow them to cool on a wire rack.
Prepare the Icing
In a bowl, mix powdered sugar, milk, and vanilla to make the icing. Divide into different bowls and add food coloring as desired.
Decorate
Once the cookies are completely cool, decorate them with icing and sprinkles. Let the icing set before serving.
Enjoy your delightful heart-shaped sugar cookies!
Pro Tips
- For a fun twist, try adding lemon zest to the dough for a refreshing flavor. Additionally, baking them a little longer for a crispier cookie can offer a delightful variation. Don’t forget to let them cool completely before icing to prevent any melting.
Creative Variations
While the classic sugar cookie is delightful on its own, don’t shy away from adding zest to the dough. Grated lemon or orange rind can introduce a lovely citrus flavor that complements the overall sweetness. Start with a teaspoon of zest and adjust based on your taste preference. Just remember to balance it so the main flavor of the cookie isn’t overwhelmed.
Additionally, try incorporating mini chocolate chips or chopped nuts into your dough for an added texture and flavor layer. These ingredients can enhance the cookies without overpowering their characteristic sweetness. If you opt for nuts, I recommend using slivered almonds for a subtle crunch and pairing with the almond extract already in the recipe.
If you're feeling adventurous, consider adding spices like cinnamon or nutmeg for a warm touch, especially around holidays. Start with a half teaspoon and taste the dough for adjustments—just remember that spices can become more pronounced after baking.
Storage and Freezing Tips
To keep your charmers fresh, store the cooled cookies in an airtight container at room temperature. They can last about a week, maintaining their delightful flavor and texture. Alternatively, for longer storage, these cookies freeze beautifully. Stack them with parchment paper in between layers and place them in a freezer-safe bag or container; they can last up to three months.
When you're ready to enjoy your frozen cookies, simply remove them from the freezer and let them thaw at room temperature for about 30 minutes. If you'd like to refresh their texture, pop them in a preheated oven at 350°F (175°C) for just 3–5 minutes. This will revive their softness and flavor as if they were just baked.
If you decide to freeze the cookie dough instead, scoop individual cookie portions onto a baking sheet lined with parchment paper and freeze until solid. Once frozen, transfer the dough balls to a zip-top bag. When you want fresh cookies, bake the frozen dough directly from the freezer, adding a couple of extra minutes to the baking time.
Questions About Recipes
→ Can I freeze these cookies?
Yes! After baking, let them cool completely, then freeze in an airtight container for up to 3 months.
→ What can I use instead of butter?
You can use margarine or a dairy-free butter substitute if you need a lactose-free option.
→ How do I store leftover cookies?
Store them in an airtight container at room temperature for up to 5 days.
→ Can I make the dough in advance?
Absolutely! You can make the dough ahead of time and keep it in the fridge for up to 3 days or freeze it for up to 3 months.
Charming Heart-Shaped Sugar Cookies
Created by: The Flavorshade Team
Recipe Type: Classic Baking Recipes
Skill Level: Intermediate
Final Quantity: 24 cookies
What You'll Need
For the Cookies
- 2 3/4 cups all-purpose flour
- 1 teaspoon baking powder
- 1/2 teaspoon salt
- 1 cup unsalted butter, softened
- 1 1/2 cups granulated sugar
- 1 egg
- 1 teaspoon vanilla extract
- 1/2 teaspoon almond extract
For the Icing
- 2 cups powdered sugar
- 2 tablespoons milk
- 1 teaspoon vanilla extract
- Food coloring (optional)
- Sprinkles (optional)
How-To Steps
In a bowl, whisk together flour, baking powder, and salt. In another bowl, cream together butter and sugar until fluffy. Beat in egg, vanilla extract, and almond extract. Gradually add dry ingredients, mixing until just combined.
Wrap the dough in plastic wrap and refrigerate for at least 1 hour. Once chilled, roll out on a floured surface and use heart-shaped cookie cutters to cut the dough into shapes.
Preheat the oven to 350°F (175°C). Place the cookies on a baking sheet and bake for 8-10 minutes, or until edges are lightly golden. Allow them to cool on a wire rack.
In a bowl, mix powdered sugar, milk, and vanilla to make the icing. Divide into different bowls and add food coloring as desired.
Once the cookies are completely cool, decorate them with icing and sprinkles. Let the icing set before serving.
Extra Tips
- For a fun twist, try adding lemon zest to the dough for a refreshing flavor. Additionally, baking them a little longer for a crispier cookie can offer a delightful variation. Don’t forget to let them cool completely before icing to prevent any melting.
Nutritional Breakdown (Per Serving)
- Calories: 150 kcal
- Total Fat: 6g
- Saturated Fat: 4g
- Cholesterol: 20mg
- Sodium: 50mg
- Total Carbohydrates: 22g
- Dietary Fiber: 0g
- Sugars: 10g
- Protein: 2g